
Last Monday we talked about the Offensive Objectives, and how play with each has changed going into wave 2. Today, we are going to go into the yellow: Defensive Objectives. Navigation is still to come, probably next week.
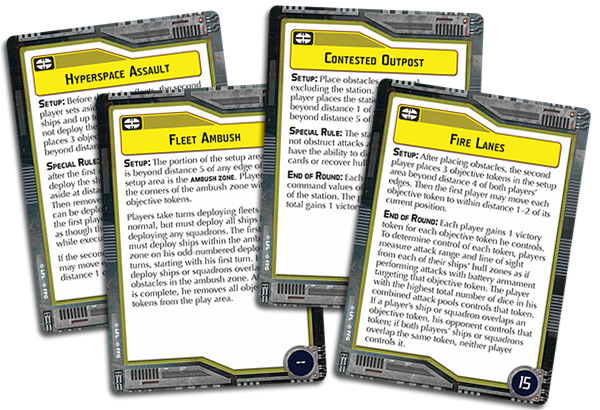
Contested Outpost:
This objective puts a maximum of 120 extra points on the table to be grabbed, with each turn giving a new chance to pick up 20 from controlling the station. It also removes a full obstacle from the game, except as an objective site - it no longer obstructs attacks or repairs ships and squadrons that overlap. It also creates a specific area that you know is going to be fought over, and benefits ships with high command values.
Second Player:
Not only do you get to place the station itself, but you get to place 3 of the 5 remaining obstacles, which can be used to block off your opponent's access to the station if they aren't careful. This objective is usually seen as being best for Imperials back during Wave 1, because Imperials love objectives that dictate where the opponent is going, and give points even when the enemy tries for a flank. Any Imperial ship is exceptionally good at putting fire on an enemy that needs to be at Range 1 of a very specific location, after all. Traditional Rhymerballs also love sitting directly on top of the station, as it doesn't obstruct attacks, and firing to medium range at anything that dares wander close.
For Rebels, this can be a decent objective too, but it requires a different than typical mentality. Nebulon Bs remain the most point efficient 2 Command ship, and have the speed to grab the station on the first turn, and the powerful front arc that pointing at the objective benefits. B-Wings or other squadrons can sit on the station, and harass any enemy ship that comes close. The MC80 has the ability to hang around the station for an extended period, and still be able to throw attacks at long range, plus the staying power to handle a few rounds of fire from an enemy determined to shake them off.
The most important thing as Second Player though is to make sure you get the first round of points, and have a plan to ensure that the second and third rounds are yours. 60 points up on your opponent is a difficult hole for them to climb out of.
First Player:
Your first advantage is being able to block off possible station locations with your own rocks. If you see your opponent setting up to block your obvious access to a specific place on his part of the map, you can place one of your obstacles to block that spot.
Your other advantage is that you should be able to figure out, even before deployment begins, where his ships are going to go down to take and hold the objective. That means you can set your own ships up to flank, or to brawl with him if you think you can straight up win a punching match. Worst case scenario, you are trading him points for a significant positional advantage, which can be very worthwhile - especially if you outgun your opponent at a specific range band.
Overall:
The biggest thing to remember, is that while the station is worth 20 points each turn if you are holding it, the high command value ships that are holding the station are almost certainly worth more than 60 points - do not become so concerned with holding the station that you let yourself get into a position you do not want to be in. It is very easy to rack up objective points, but ultimately lose because your ships have been turned into rapidly expanding debris.
Fire Lanes:
You have 3 objective tokens that you get to target with your anti-ship battery as though making an attack. Whoever has more dice on the targets gets the tokens. Just don't overlap them, as you give your opponent those tokens. This is an objective that favors more ships, with more dice, and long range dice as the tokens don't care what color is pointed at them, just that they are in range. I really feel like this objective loves Red dice for both players, as you can hold the objective and engage the enemy all from long range.
Second Player:
Your best bet as Second Player is a list that has a ton of dice. This objective favors a build with lots of dice - even if your ship isn't maneuverable, you know exactly where these objectives are going to be, and where your opponents will go to claim those objectives. You need to build to be able to reasonably claim 2 / 3 fire lanes every turn, giving you 30 points to 15 points or a 90 point advantage in the end game. If you can grab all 3 of the tokens on the first two turns, that is 90 points right then and there. The easiest way to get this is with large, dominant arcs, and slow, deliberate movements. All medium and large ships can work well, as do upgrades that increase your battery armament (avoid ones that just add dice). Enhanced Armaments, Expanded Launchers, and Rapid Reload all give you more dice that you can use to ensure you have those objectives locked down.
A single cheap ship near an uncontested token could give you 90 points all by itself at the end of the game - worthwhile if you know your opponent cannot split his forces at all.
There are a few options for setting up the tokens, with a debate between clustering them together, or splitting them apart. Consider either one based on your opponent's setup, based on how easily you think you can outgun them in each instance.
First Player:
As first player, you have to rush in to ensure that you get those objectives. Your best bet is a list that has a lot of speed, and can lob long range shots to contest the objectives before coming in close. It is also very dependent on your opponent's list - can you outgun them, especially if you get in close? If not, you're probably better choosing a different objective.
Overall:
This is an objective that is very dependent on overwhelming firepower, and isn't very big on squadrons. Bring lots of dice, and the more Red the better, as you can move around and still keep dice on the objectives.
Fleet Ambush:
Fleet Ambush splits the first player's forces to give the second player positional advantage. No additional points are available, nor are any scoring rules in play - this is just a straight up fight, with different starting locations.
Second Player:
The assumption, as Second Player, is that you are going to be able to get your guns into play on the very first turn against the opponent, and eliminate most or all of their ambushed fleet before reinforcements can arrive. Your fleet should be set up for a serious Alpha Strike. Demolisher, Salvation, Yavaris, Avenger, Rhymerballs (both Vanilla and Cinnamon Flavor) are all good options for being able to throw a lot of dice at your opponents right off the bat.
The other advantage that you get, is it forces players to put down ships before squadrons. If you have a lot of ships and a low squadron count, this could benefit you buy getting a low ship count opponent to put their forces on the table before stalling with their squadrons.
First Player:
Your best bet for a good Fleet Ambush is to be able to turn the ambush around on the opponent. Black dice ships, ships that want to get in close and brawl, are all suddenly that much closer to the fight. For that matter, your composition could just lend itself towards the ambush. A pair of ISDs and a Raider with your Admiral on board, for example, are not particularly worried about putting down the ISDs in the middle of the field, and the Raider way in the back. An MC80 or AFII that can set up sideways, already presenting for a broadside, isn't as concerned with the ambush either. Having a follow up ship like a Nebulon B or Raider that can rush in from the flanks is a big help.
Don't forget, you can put all of your squadrons into the middle with your ships. Very good if you think that you can easily and quickly win a squadron engagement.
Overall:
This is an objective that is spoiling for a brawl. Know that and expect it if you see it pop up. This will be very bloody.
Hyperspace Assault:
In this objective, the second player sets aside one ship and up to 3 fighter squadrons before either side begin deployment but after obstacles are down. He then puts three objective tokens down. Then, starting in the 2nd round, the second player may at the beginning of the round choose an objective token and deploy the ship he set aside within R1 of the token, or he can choose to move those tokens to within R1 of their position.
This may be my favorite objective. Not because it is always a good decision to pick, playing with it or against it. But because it feels the most thematic to Star Wars.
Second Player:
You have a ship and (maybe) some squadrons that would be immensely improved by being in the rear arc of the enemy formation. You have a desire to give up a turn or two of combat for your ships and continuity of your formation to have positional advantage with one of them. You want one ship that can do an exceptional amount of damage from that position, and (maybe) some good squadrons to go along for the ride. Rogue Squadrons and heavy hitting ships like Demolisher or MC30s are the best for this. Yavaris and B-Wings are another favorite. That being said, you need other threats facing forward. After all, if your entire threat is tied up in hyperspace, why wouldn't your opponent race forward and engage your weaker, already deployed group?
First Player:
There are two good ways to minimize the effect of a Hyperspace Assault. Option #1 is to screen the possibly jump zones with your own squadrons. If your opponent drops into your squadrons, you can place them as though it is an overlap, plus they can get a jump on shooting the enemy ship, especially if it jumps in without squadron cover of its own.
Option #2 is to rush forward, and be past the objective tokens before your opponent can drop in. Remember that the second player jumps in at the start of the round, and then you get the first activation. That means a significant advantage in getting out of an enemy's arc, or getting into a better one - or getting the first shot off if you have a heavy damage dealer pointed at the enemy's jump in point.
Overall:
Chances are, I will pick this objective, while saying "this is a terrible idea, but..." It's just fun to play, and that's why you're playing the game, right?
Just remember two last things: Any upgrade (including Commander abilities) on the Hyperspace ship do not affect the rest of the fleet. And if you don't jump in before the game ends, that ship and squadrons are counted as destroyed.
And that is it for Defensive objectives. Keep your eyes open for Navigation objectives, or become a subscriber to know immediately when a new article is posted!
Great stuff - thanks.... I haven't played with objectives yet (8 games in and I think I've now got the hang of the core rules...) but this is great, as the rulebooks don't really make it clear what they're all about.
ReplyDeleteWarburton
You definitely should play with the objectives - it really adds an extra level of strategy to the game, and greatly enhances the replayability.
DeleteIt is one of the big reasons why I chose to focus on this game over X-Wing.
I think we will pretty soon, as said we've got the hang of how the ships work and interact so I think we're ready to take it to the next level! Thanks.
DeleteW
About fire lane, you seen to forget that squadrons can control the objective if there are on it.for me fast squadrons and rogue are very useful to denied early control to the second player or to force the first player to come at a lonely squadron holding the objective you have set up the other side of the table as your ships defends the 2 others tokens.
ReplyDeleteYou are going to want to look at the wording on the card again. Squadrons don't control a fire lane objective token, they actually give control to your opponent if they are overlapped.
DeleteOups, wishfull reading. Thanks for opening my eyes.
DeleteThis comment has been removed by the author.
Delete